Façade Installation and Setup

Page Contents
- Getting Started
- Installing Façade
- Setting up Façade like the demo/front page slider
- Façade Theme Options
- Façade Theme Customizer
- Portfolio Setup
- Rotating Testimonials
- Responsive Images & Video
- Façade custom widgets
- Shortcodes
- Page Templates
- Sidebar Commander (Custom widget areas)
- Installing a child theme
Getting Started
Here’s a step by step guide to installing and setting up Façade to make sure you get up and running as quickly as possible.
Domain & Hosting
Before you can install Façade, you must have a hosted website domain.
Need hosting? Use our recommended host and get a special discount coupon here.
You can also use your own hosting, as long as your host supports WordPress (which is almost all hosts these days). Click here to find out the specific hosting requirements for running WordPress.
WordPress
The next step is to install WordPress. Most hosts allow you to do this in one click. Every host is different, so if you have problems please contact your website host.
If your host does not offer a one-click install, please see this page at wordpress.org for manual installation instructions.
Note: Do not install WordPress in your root directory on top of your old website! Instead, install in a sub directory (folder) like http://www.yoursite.com/wordpress. Build the site there, then you can move it into the root directory later.
Installing Façade
Ok, now for the good part. Let’s get Façade installed!
Installing Your Theme through WordPress (Recommended)
- Download the theme’s .zip file
- Log in to WordPress, go to Appearance > Themes
- Click on the “Install Themes” tab, and click the blue “upload” link
- Upload your theme’s .zip file, then activate the theme
Or…Install your theme through FTP
If you would like to upload your theme via FTP, follow these instructions.
- Download the theme’s .zip file
- Unzip the theme folder
- Upload the unzipped folder to the wp-content/themes folder on your server
- Log in to your WordPress admin area, go to Themes, and activate the Façade theme
After that, your theme should be ready to go!
Want us to install WordPress + Façade for you? We can install BOTH for you straight away for a small one-time fee.
Click here for more details.
Setting Up Façade like the demo site
Learn how to setup your site to look like the demo site. This video includes installation, custom menus, content slider setup, and more.
Façade Options
Façade has an advanced theme options page that makes customizing and setting up your website incredibly easy. To access the theme options, log in to your WordPress admin area, and go to Appearance > Facade options.

The sections below cover each theme option in detail.
Custom Colors and Layout
Choose the default layout used for all posts and pages by default. Upon theme activation this is set to a two-column layout with the sidebar to the right. When this setting is changed it affects all posts/pages.
Note: You can override this on individual posts/pages if you need to modify the column layout for a specific page.
To change the color scheme use the drop down box. Façade includes 6 unique color schemes.
Custom Favicon
Upload a favicon image of type .ico to your media library then post the URL in the Custom Favicon theme options text box. This will then be displayed in your web browser tab when viewing your site.
Note: Not all browsers support displaying of Favicons.
Custom CSS
Normally, if you wanted to modify your site CSS this meant creating a child theme. Otherwise, if you just went ahead and altered the main theme style sheet all your changes would be lost during a theme update.
However, Façade allows you to enter snippets of CSS directly into theme options so you don’t need to go to the trouble of creating a child theme unless you have a lot of customizations to make. Even if you decide to create a child theme you can still enter snippets of CSS in the Custom CSS text box in theme options.
The order of priority for CSS styles is: Main (parent) theme styles > Child theme styles > Custom CSS theme option styles. i.e. the styles entered in the Custom CSS text box will always have priority over child theme styles.
Customize Homepage Bar
Façade includes support for a featured Homepage bar which is displayed only on the front page. Enter HTML in the Customize Homepage Bar text box that you want displayed in this Homepage bar or leave blank and it won’t be displayed. See the live demo homepage for an example of how it looks (located just below the slider).
Miscellaneous Options
This section contains some check boxes to turn certain theme features on/off.
The bread crumb trail shows a hierarchical view of the current page. You can show images in a pop-up lightbox by enabling Fancybox. Fitvids allows videos to be dynamically resized. And finally you can choose to use the built-in SEO theme feature or turn it off if you want to use your own solution.
General Settings
The e-mail specified in general settings will be used to send the contact form page template messages to.
Header & Footer Inserts
The header and footer insert boxes allow you to add code into the <head> and <footer> areas of each page and post. You can paste your Google Analytics script into one of these boxes.
Façade Theme Customizer

Façade uses the built-in WordPress theme customizer to provide an alternative (and much better) way to modify certain theme features, such as the logo uploader and multiple color pickers. If you like having theme options to play around with then you’re going to love the theme customizer! Perhaps the BEST thing about it is that you get to preview changes in real-time and then accept those changes only if you are happy with them.
To open the theme customizer do one of the following:
- Go to Appearance > Facade Options and click the Theme Customizer button.
- On the front end of your site, when logged in, click the Customise drop down menu link from the WordPress toolbar.
- Click on Appearance > Customise.
Watch the Theme Customizer in Action!
Site Logo, Title & Tagline
The first section in the theme customizer controls your site title, tagline description, and logo. Expand the arrow to the right of the title to display the controls. Changes to the site title or description text will be updated in real-time in the preview window to the right. You can also choose to hide the tagline completely by checking the Hide tagline box.
You can easily upload a logo image to your site header. Once set the logo replaces the title text. If the logo is removed then the title automatically re-appears.
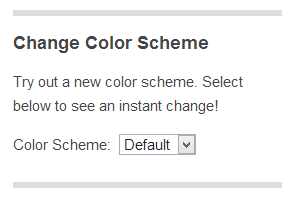
Color Scheme
There is just one drop down box in this section, to allow you to choose the active color scheme for your site.
Custom Font
This section gives you access to well over 600 Google web fonts. Choose the font you want to apply to the HTML elements specified in the Font CSS Selector text box.
You can do this by selecting a font from the Choose Font drop down, or by specifying any valid Google web font URL. To obtain the URL follow these steps:
- Open the Google Web Fonts site, which looks as follows:

- Search for a font you like and then click the Quick-use link.

- On the Quick Use page select the options you want to include with your font in section 1. Normally you can just leave the default selection, but sometimes certain fonts include support for italics, and bold etc. which you can select manually.
- Now for the important bit. In section 3 of the Quick Use page you need to copy the font link. This is the link inside the href attribute of the link tag. For example, for the Snowburst One font the link you need to copy is http://fonts.googleapis.com/css?family=Snowburst+One as shown in the image below:

- Paste this link into the Use Alternative Google Font text box in your theme customizer. After a couple of seconds you will see the font change on your site in real-time!


You can change the HTML elements the font applies to via the Font CSS Selector box.
Colors
There are over a dozen individual color pickers allowing you to directly change almost every color in Façade you can think of. This gives you full control over your site colors without having to get your hands dirty with CSS!
Background Image
You can easily change the background stripes in Façade by uploading a new background image via the theme customizer. There are also flexible settings for tiling, position, and scrolling. If you just want to change the color of the stripes then this can be changed in the colors section of the customizer.
Navigation
Set the navigation menus to custom menus defined in Appearance -> Menus in the WordPress admin area.
Static Front Page
Set your front page to display blog posts or any active (published) page.
Portfolio Setup
The portfolio uses a custom post type and a page template to display your items. Learn how to set it all up in this video.
(The video uses a different theme, but Façade works in exactly the same way)
Testimonials
Using the new testimonial custom post type feature, you can group and display your testimonials easily. Rotate them on each page, and use the shortcode to put them anywhere. This video explains how.
(The video uses a different theme, but Façade works in exactly the same way)
Responsive Troubleshooting
Façade is a responsive theme, which means that it scales for mobile devices and smaller screens. However, when you add content there are some things you have to do to make sure it all works right.
Responsive Video
Videos are a pain to make responsive. Façade includes the fitvids.js script to make Youtube and Vimeo videos responsive, for everything else you’re on your own.
To enable this, go to Appearance => Facade Options, and check the “Enable Fitvids” box, then save. Note: this will make all of your videos 100% width, which may not be desirable. Unfortunately, that’s the only way to get it to work.
Façade Custom Widgets
Façade comes packaged with several custom widgets. To activate these widgets, login to your WordPress admin area, then go to Appearance > Widgets. Drag and drop the widgets into the different widget areas on the right, these will show up in different places on your site.

Twitter Feed Widget
The Twitter Feed widget displays the latest tweets from your timeline. To activate this widget, just drag and drop it into any widget area, and enter your twitter id. Do not enter the full url or @ symbol. For example, if your Twitter url is http://twitter.com/presscoders, simply enter presscoders.
You can also optionally specify a widget title, show the timestamp, and limit the number of Tweets displayed.

Testimonials Widget
This widget allows you to display a group of existing testimonials. If you haven’t created any yet then go to “Testimonials” in the WordPress admin and create some. Add them to a common testimonial group and then specify this group in the Testimonials widget.
You can optionally specify a testimonial title and description, as well as the maximum number of testimonials to show regardless of how many are in the group. Additionally, if you check the ‘Show random testimonials’ box then each time the page loads the order of testimonials is rotated.
This can be used to great effect with the ‘Max number of testimonials’ option. For example, if you have a group with 10 individual testimonials in, and set the maximum number to 2 then upon each page load you will see 2 random testimonials from the group of 10. i.e. you will get a nice set of random testimonials appear with few duplicates.

Info Box Widget
Add this widget to the Header or Footer widget area to make sure your customers can find your contact info on every page, and connect with you on social media. Just fill in your phone number and social media URL’s to point to your social media pages.
You can also optionally specifiy a title, description, and an expandable search box.

Recent Posts Excerpt Widget
Display a shortened version of your blog posts in the sidebar with this widget. Simply specify the category to show posts from and a maximum number to show. You can also optionally specify a title.

Blog Style Recent Posts Widget
This widget is similar to the Recent Posts Excerpt widget except you can choose to show post featured images too. This widget is best used in the main content widget area of a widgetized page.
Color Switcher Widget
This widget allows your site users to alter the site color scheme for THEIR browser only. It isn’t a site wide setting. Only admin can alter the main color scheme via theme options or the theme customizer.

Content Slider Widget
This widget allows you to display a group of existing slides. If you haven’t created any yet then go to “Slides” in the WordPress admin and create some. Add them to a common slide group and then specify this group in the Content Slider widget.
You can optionally specify the maximum number of slides to show regardless of how many are in the group. There are additional settings for showing random slides, autoplay, slide smooth height, and whether to loop the slides. There are also some transition timing settings to tweak how one slide merges into the next.
Shortcodes
Shortcodes allow you to easily add pre-designed elements to your website.
Testimonial
Usage: [testimonial name="David Gwyer" company="Press Coders" image="http://www.mysite.com/imageurl.jpg"]Put testimonial text here. Don't forget the closing shortcode![/testimonial]
The image url field accepts either an image url or a valid gravatar.com email address.
Button
Usage: [button color="green" link="https://www.presscoders.com"]Button Text Here[/button]
Acceptable colors: Gray, Black, White, Green, Blue, Yellow, Red, (no color specified reverts to default)
Box
Usage: [box color="blue"]Box text and media goes here. Shortcodes inside box ok.[/box]
Acceptable colors: Green, Blue, Yellow, Red, (no color specified reverts to default)
Columns
To create columns easily, use these shortcodes. Don’t forget any closing shortcodes, and make sure your columns add up to 100%!
Read this post for more detailed shortcode column examples.
2 Column layout:
1 2 3 4 5 6 7 | [one_half] First of 2 columns [/one_half] [one_half_last] Second of 2 columns [/one_half_last] |
3 Column layout:
1 2 3 4 5 6 7 8 9 10 11 | [one_third] First of 3 columns [/one_third] [one_third] Second of 3 columns [/one_third] [one_third_last] Third of 3 columns [/one_third_last] |
4 Column layout:
1 2 3 4 5 6 7 8 9 10 11 12 13 14 15 | [one_fourth] First of 4 columns [/one_fourth] [one_fourth] Second of 4 columns [/one_fourth] [one_fourth] Third of 4 columns [/one_fourth] [one_fourth_last] Fourth of 4 columns [/one_fourth_last] |
Mix and match for complex column structures:
1 2 3 4 5 6 7 | [one_third] 1/3 width [/one_third] [two_thirds_last] 2/3 width [/two_thirds_last] |
1 2 3 4 5 6 7 | [three_fourths] 3/4 width [/three_fourths] [one_fourth_last] 1/4 width [/one_fourth_last] |
1 2 3 4 5 6 7 8 9 10 11 | [one_half] 1/2 width [/one_half] [one_fourth] 1/4 width [/one_fourth] [one_fourth_last] 1/4 width [/one_fourth_last] |
You get the idea, use any combination of columns you want, as long as they add up to 100%, and you use _last for the last column. Have fun!
Page Templates
To use a page template, go Pages > Edit, and on the right side of the screen you will see “Page Attributes.” Choose a template from the drop down box called “Templates,” and save your changes.
Default
Displays the main content and sidebar according to your chosen layout.
Full Width
Removes the sidebar and displays the main content full width.
Blog Page
Displays your blog posts in reverse chronological order.
Contact Form
Displays a contact form. Email will be sent to the admin, this can be changed on the Façade options page.
Portfolio
Displays your portfolio items. Includes options for small, medium, or large images, plus a choice of portfolio group display.
Sitemap
Displays a sitemap of your pages in a single list.
Widgetized Page
Allows widgets to be displayed on the page.
![]()
The Sidebar Commander
This is the most advanced way to control your widgets and widget areas ever created.
Create new widget areas, fill them with widgets, and place them on any post/page you want. To make things easier here’s a project based example of what you can do with the Sidebar Commander.
(The video uses the Big Shot theme, but Façade works in exactly the same way)
Video Tutorial
Add the Slider to a different page
(This tutorial uses the Nivo Slider which is not in Façade, but the same process applies to any widget.)
You know how to add the slider to your homepage, but how do you get it on a different page?

1. Go to Appearance => Widgets, and create a new widget area
Give it a name, and click the blue +options text. Select “Main Content” widget area type, then click add new.

2. Drag the Nivo Slider widget into your new widget area, then set your options
3. Go to Pages => Add New, and create the page you want the slider on
4. On the page edit screen, select Template: Widgetized Page (on the right sidebar). Publish or save your page.

5. Scroll to the bottom of the page to the Sidebar Commander box, click the “Main Content Area” tab, and click your new widget area. Save or update your page.
If you view this page live, you will see that your Nivo Slider is now there! If you want to make this a full width slider, go back to your page edit screen and choose “Full Width” under Column Layout on the right sidebar.
You can add text and other things to your page by going back to Appearance => Widgets, and dragging another widget underneath your new slider.
Installing a Child Theme
If you want to make a lot of customizations to your site, you will want to install a child theme and make your changes there.
A child theme is simply a different folder to store your changes. In its simplest form, it’s a folder with a single style.css file in it. The point of a child theme is to keep your changes in a separate place so they don’t get overwritten when you update your parent theme (Façade).
Child Theme Download
Install and activate your child theme
- After downloading your child theme, login to your WordPress admin area. Go to Appearance => Themes.
- Click on the “Install themes” tab at the top, then click the blue text that says “Upload.”
- Find the child theme .zip file, upload it, and activate it.
That’s it! Now you can make any CSS customizations you want in the style.css, and add any custom functions in functions.php. To overwrite a theme template file, just copy the file from the parent theme to the child theme, and make your edits to the file in the child theme.
For more on theme customization, please see our WordPress theme customization guide.